How To Set Primary Monitor in Windows 10? Setting up a new Windows 10 computer can be a daunting task, especially if you’re not familiar with the operating system. Choose which type of computer you have: a desktop, laptop, tablet, or phone.
When you have determined your device type, the next step is to select your preferred settings. then you have to need to decide what type of display you have.
Monitors are a basic necessity for any computer system, and with the release of Windows 10, many users are finding that their Primary Monitor has been automatically set to their laptop or tablet screen.
If you’re not happy with this setup and would like to change your Primary Monitor back to your desktop or external monitor, there are a few simple steps you can take.
What Is The Primary Monitor In Windows 10?
Your computer has a lot of parts, but unless you’re a hardware expert, you might not know what each one does. One of the most important – yet least understood – parts of your computer is the monitor.

In this article, we’ll explain what the Primary Monitor is in Windows 10 and How To Set the Primary Monitor in Windows 10? The Primary Monitor is the one that displays all of your windows and applications.
By default, it’s the one on the right side of your screen, but you can easily change it if needed. To do so, press Windows + P on your keyboard to open the Project menu. Then select which monitor you want to be your primary display.
If you have multiple monitors connected to your computer, you can also specify which one should be used as the primary display.
Steps How To Set Primary Monitor in Windows 10?
If you want to set your Primary Monitor in Windows 10, there are a few simple steps to Set Primary Monitor Windows 10:
1. Right-Click on The Desktop And Select “Display settings”
In Windows 10, you want to change the Primary Monitor but you don’t know How To Set the Primary Monitor in Windows 10? you can do so by right-clicking on the desktop and selecting “Display settings.” This will open up a window where you can see all of your connected monitors.
You can then select the one that you want to be the Primary Monitor by using the “Make this my main display” checkbox.
2. Click on The “Advanced display Settings” Link
If you’re using a desktop or laptop with two monitors, and you want to set the main or Primary Monitor, here’s How To Set the Primary Monitor in Windows 10?
- Right-click on the Windows desktop and select the “Display settings” option
- Click on the “Advanced display settings” link
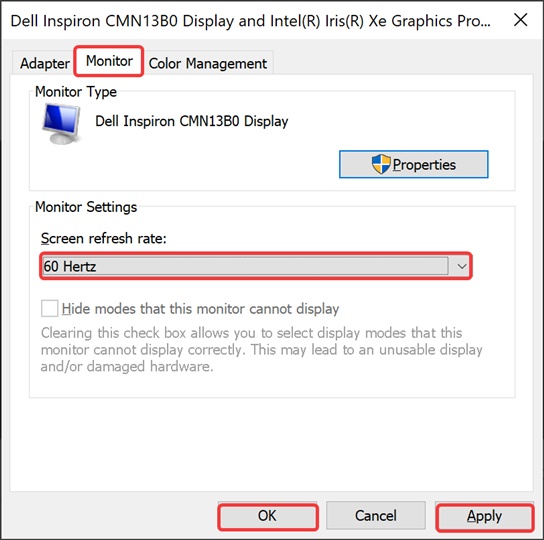
- In the “Display adapter properties” window, click on the “Monitor” tab
- The currently active monitor is highlighted in blue.
- To make another monitor the Primary Monitor, simply click on it.
- Click on the button ok when you’re done.
3. In The “Display Adapter Properties” Box, Select The “Monitor” Tab
In the “Display Adapter Properties” box, select the “Monitor” tab.
Then, under “Primary Monitor,” click the monitor that you want to be your Primary Monitor.
If you have more than one monitor connected to your computer you don’t know How To Set Primary Monitor in Windows 10? this will determine which monitor displays the Windows 10 Start screen and taskbar.
4. Select The “Primary monitor” Check Box
Windows 10 has a feature that allows the user to designate a “primary monitor.” The primary monitor is the one that will have the Start Menu and Taskbar. How To Set Primary Monitor in Windows 10? To set the primary monitor, select the “Primary monitor” check box in the Display settings.
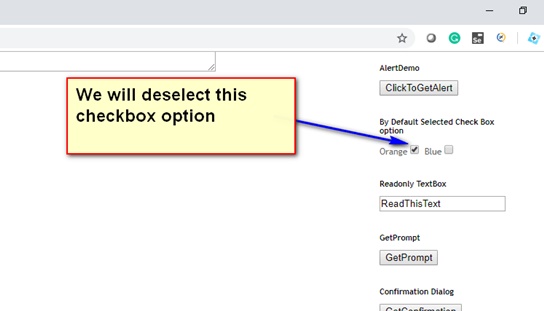
5. Deselect The Check Box
If the “Extend my Windows desktop onto this monitor” check box is selected, deselect it. How to Open or Save files in OneDrive folder in Windows 10? if you have multiple monitors connected, the operating system will by default set the primary monitor.
This is the monitor that will be used for Start Menu and Taskbar. If you want to use a different monitor as the primary one. You do not know How To Set Primary Monitor in Windows 10? you need to deselect the check box in Settings.
- Open Settings by pressing the Windows logo key + I on your keyboard.
- Click on the option of System.
- Click the Display tab on the left pane.
- Under the “Multiple displays”, make sure that the option of “Make this my main display” is unchecked.
If you have more than one monitor connected to your computer and want to use a specific one as the primary monitor, you can do so in Windows 10 by deselecting the “Make this my main display” check box in Settings under “Multiple displays”.
Conclusion
In conclusion, by following the simple steps listed above, you can quickly and easily set your primary monitor on Windows 10. Make sure to test out different settings and configurations to see what works best for you. Happy computing!
Setting your primary monitor in Windows 10 is a simple process that can be completed in a few minutes. By following the steps outlined in this article, you can make sure that your computer is configured to display all of your content on the correct screen.